
Deployments Basic Core Network (SDN)
Video Walkthrough: We have created a video demonstrating this experiment where we perform the procedure and explain the steps. Click here to watch on YouTube
Introduction to the 5G Service-Based Architecture (SBA) Dashboard
The 5G Service-Based Architecture Dashboard allows you to deploy, configure, and validate core network functions (NFs) in a simulated 5G Core environment.
You can deploy the 5G Core using either of the following methods:
- Deploy using Terminal
- Manual NF-by-NF Deployment
- One-Click Core Deployment
Each method is described in detail below.
Method 1: Deploy Network Functions Using Terminal (Docker Compose)
This method allows you to deploy all Network Functions at once using predefined Docker Compose configurations.
Step 1: Open the SBA Terminal
- Launch the SBA Dashboard.
- Click the Terminal button available in the dashboard interface.
- Ensure you are in the project root directory.
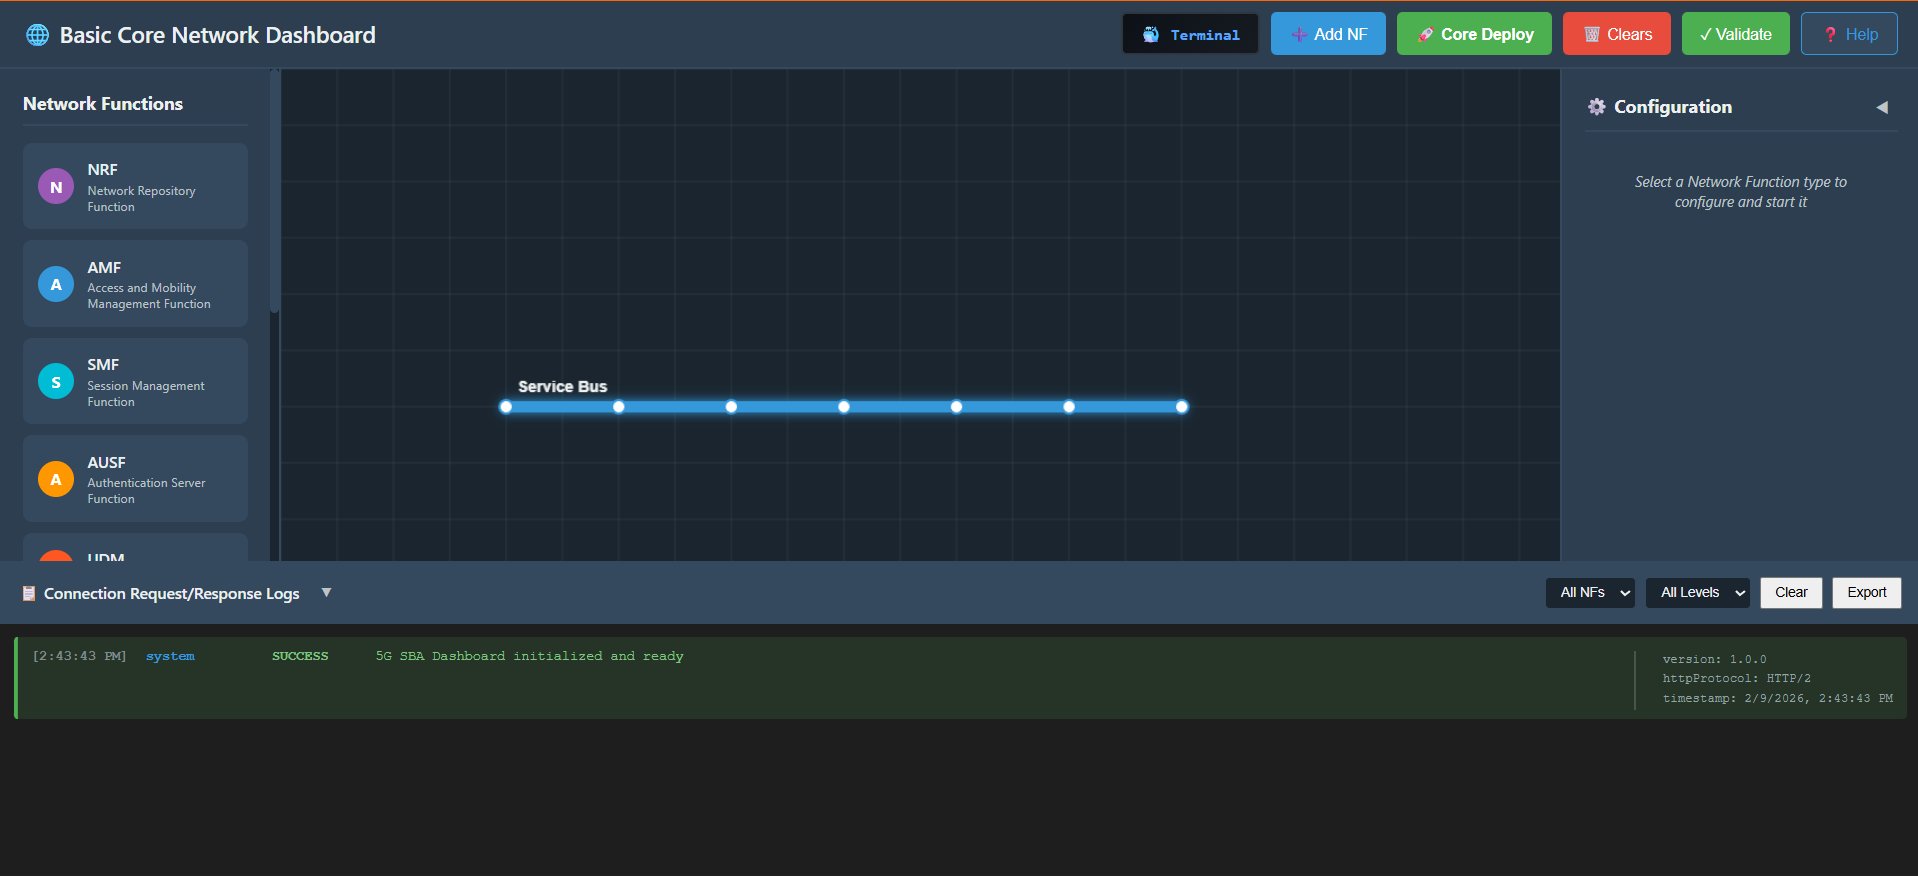
Fig: SBA dashboard terminal button and interface.
Step 2: Launch All Network Functions
Click on the terminal button to open the terminal then from the project root directory, execute the following command:
docker compose -f docker-compose.yml up -d
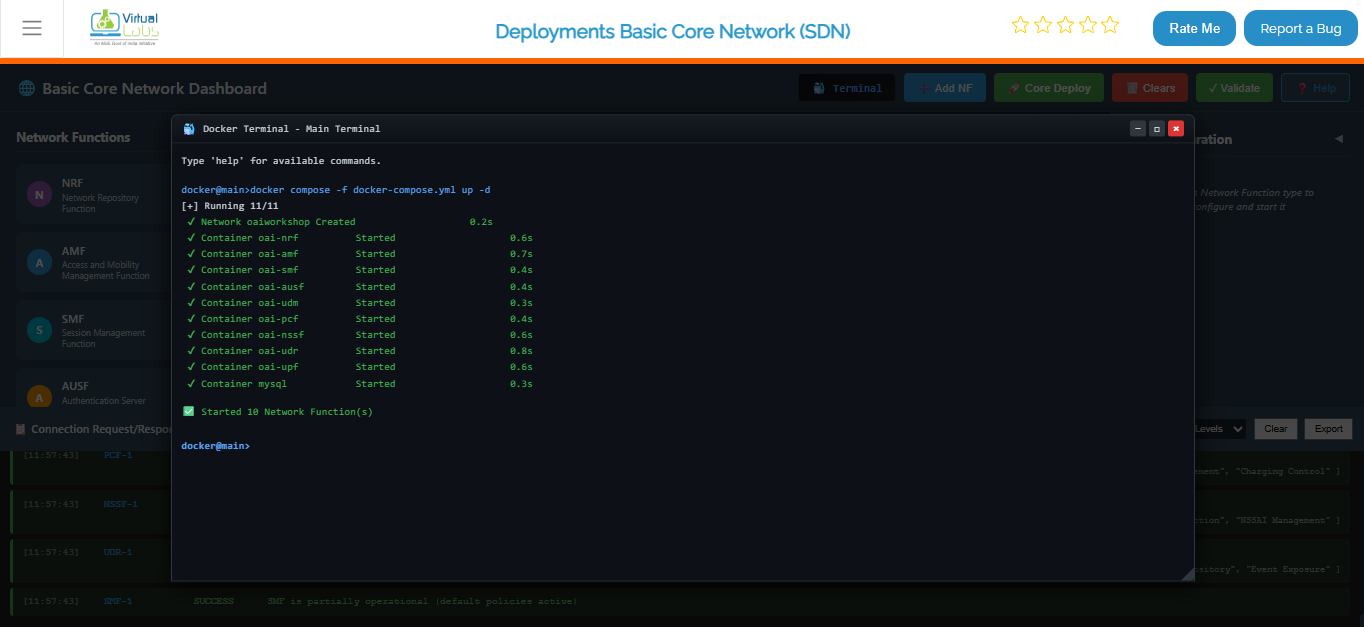
Fig: Terminal output showing core network deployment with docker compose.
This confirms that all core NFs and supporting services are running successfully.
Step 3: Verify Docker Network Creation
List available Docker networks:
docker network ls
You should see the oaiworkshop network:
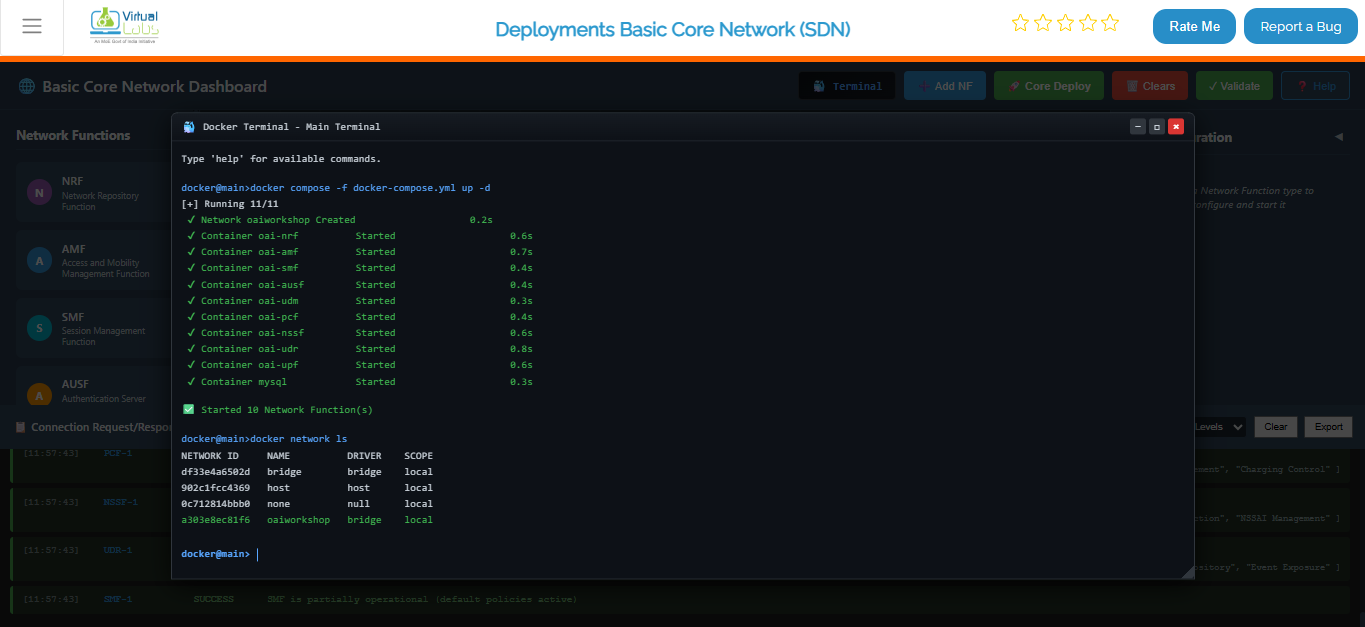
Fig: Docker network list showing oaiworkshop network.
Step 4: Inspect Network and NF IP Assignment
Inspect the OAI network to verify IP allocation:
docker network inspect oaiworkshop
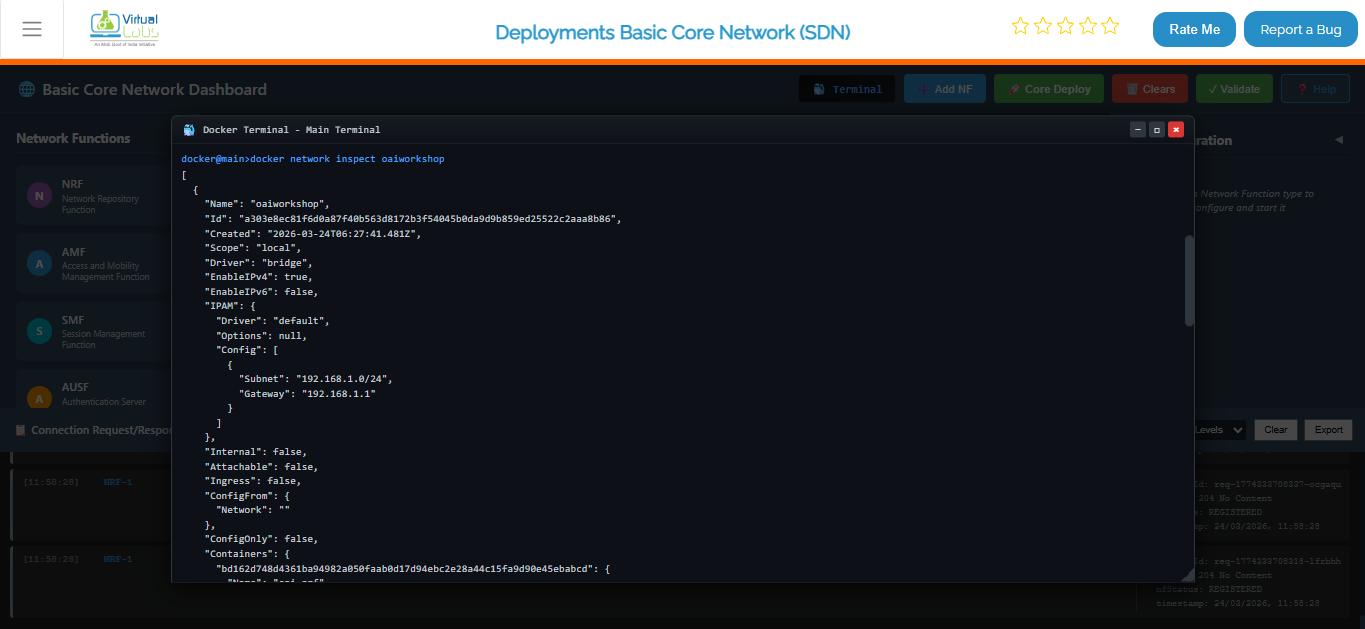
Fig: Docker network inspect output for IP assignment verification.
This confirms successful NF deployment and network stabilization.
Step 5: Stop and Remove All Network Functions
To stop and clean up all running containers and networks:
docker compose -f docker-compose.yml down
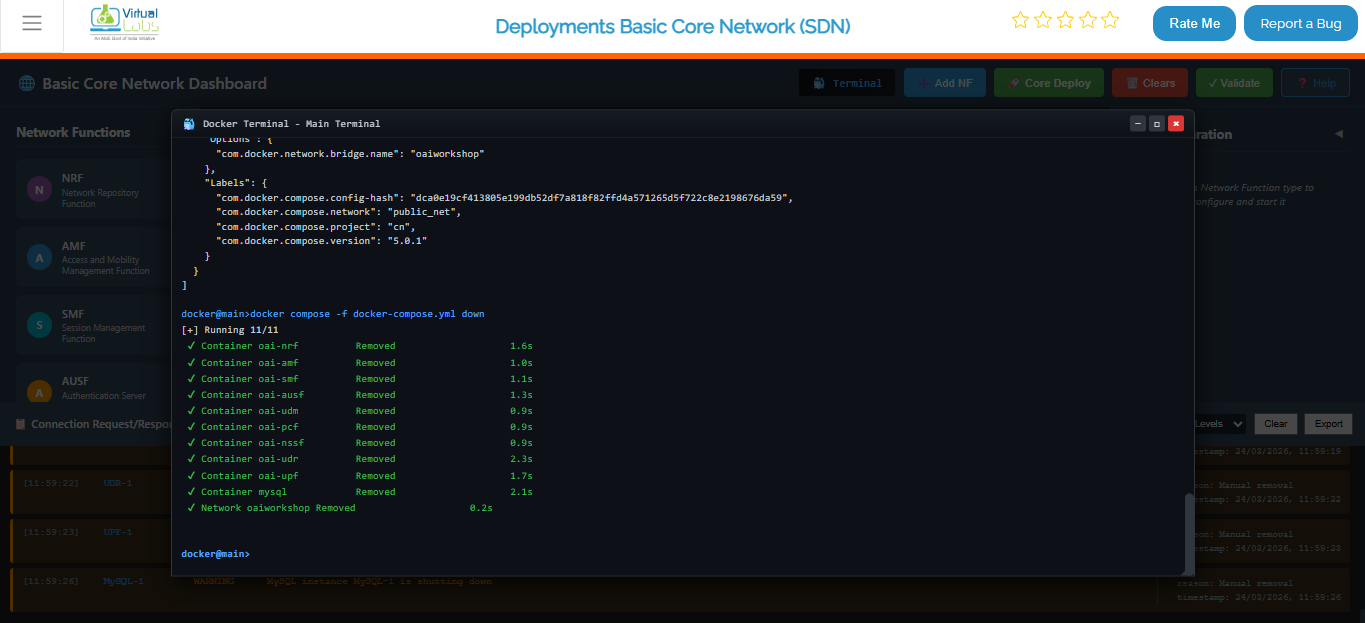
Fig: Docker compose down cleanup of core network containers.
Method 2: Start NFs Manually (One by One)
Step 1: Select and Configure a Network Function (NF)
- Select an NF:
- Click any NF type (e.g., AMF, SMF, UPF, NRF, AUSF, UDM, PCF, etc.) on the dashboard.
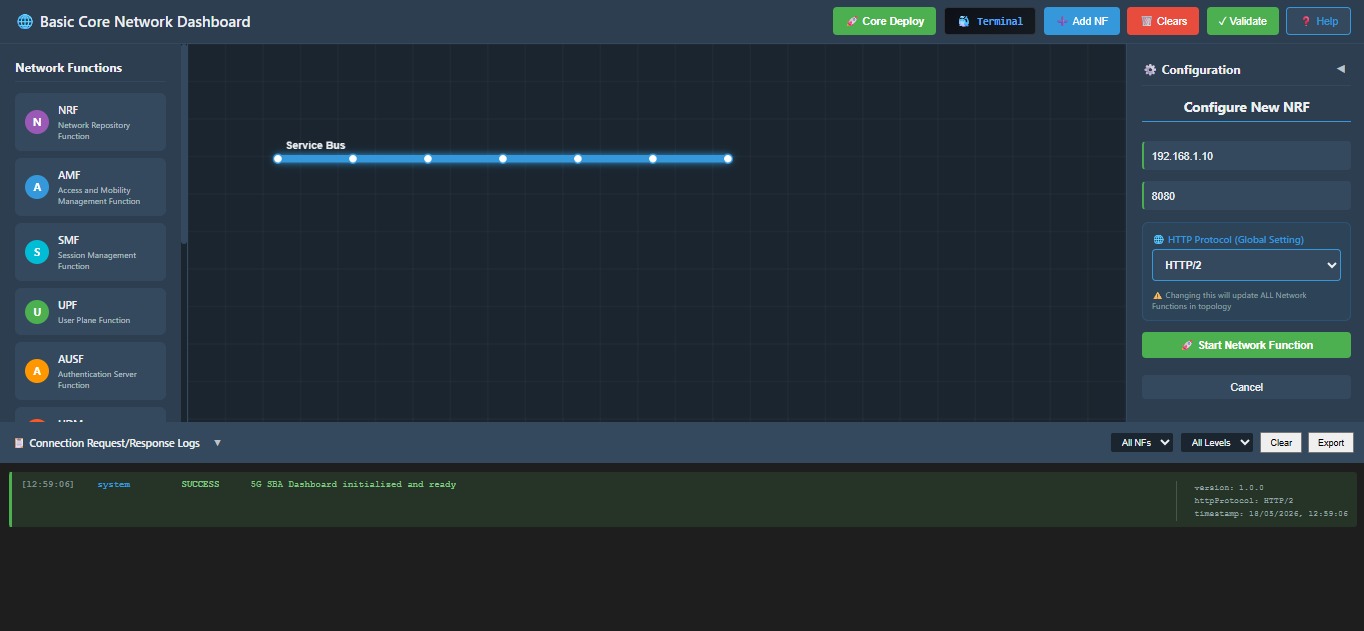
Fig: NF selection and configuration interface on the dashboard.
Enter Configuration Details:
- In the NF Configuration Panel:
- IP Address: Enter a valid IPv4 address (e.g., 192.168.1.12).
- Port Number: Provide the NF's port (e.g., 8080, 9090, etc.).
- Protocol: Select the protocol from the dropdown: HTTP/1 or HTTP/2.
- In the NF Configuration Panel:
Start NF:
- Click the Start NF button.
Wait for Stabilization:
- The NF takes around 4–5 seconds to initialize and stabilize.
- Once ready, it will automatically attempt to communicate with other available NFs.
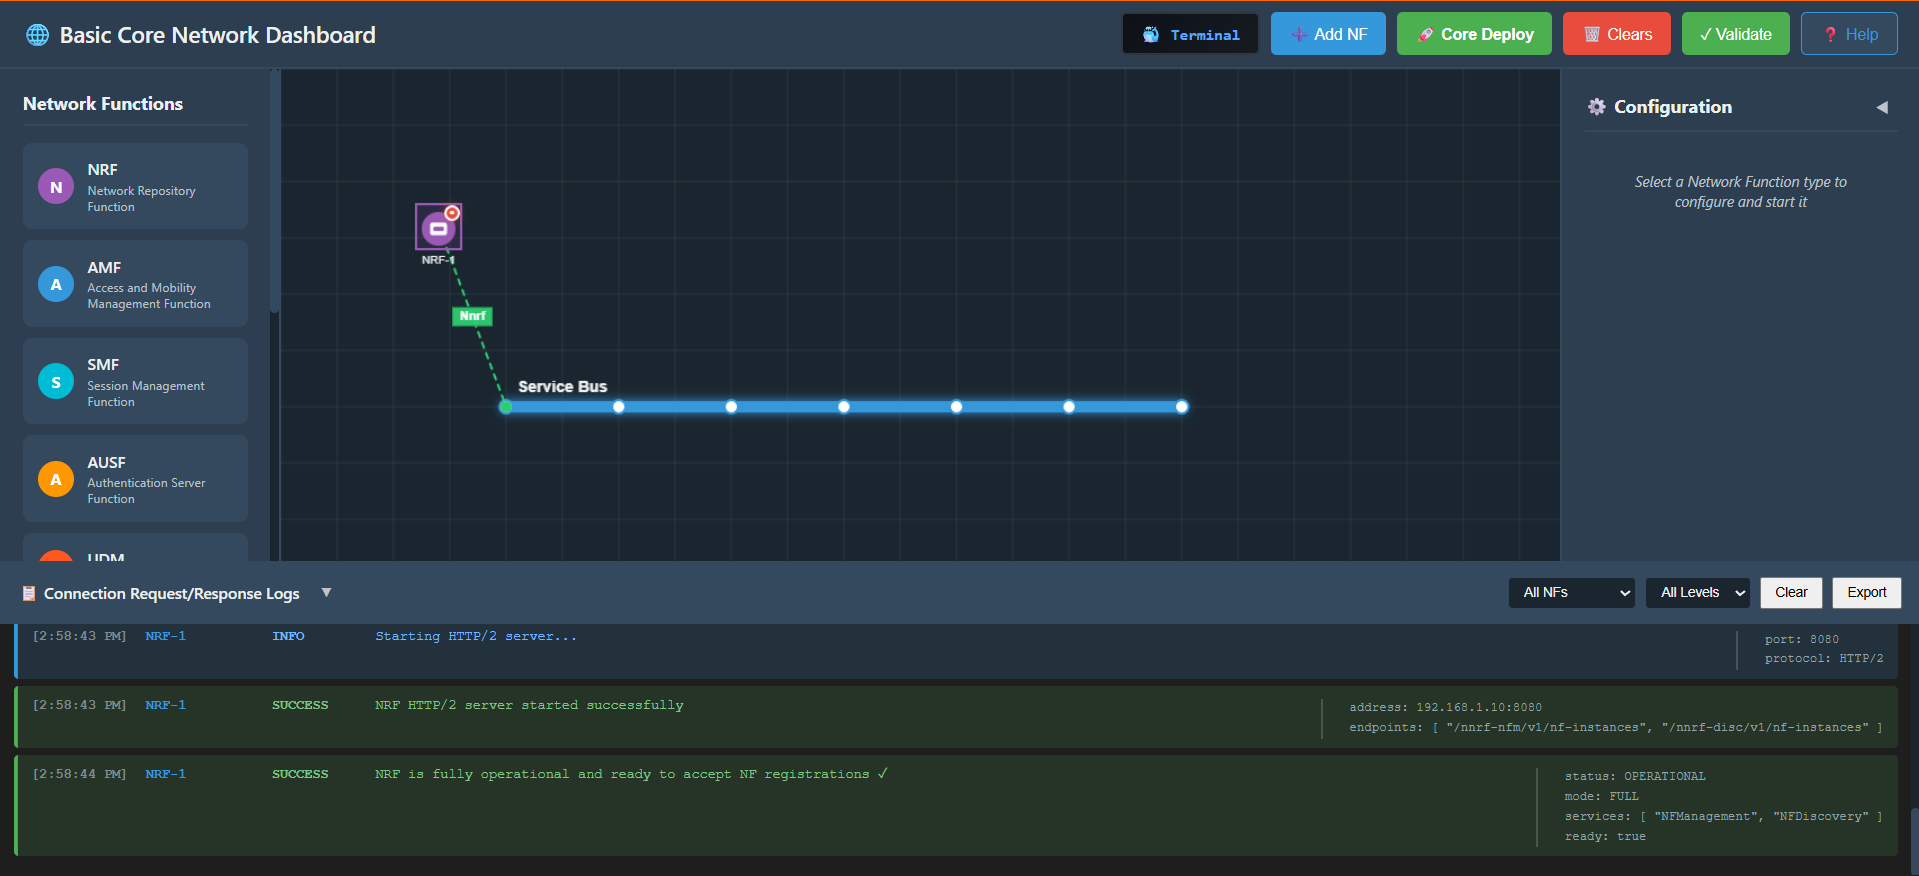
Fig: NF initialization and configuration progress status.
Step 2: Repeat the Process for All NFs
Follow Steps 6 for each NF in the topology.
Once all NFs are:
- Configured
- Started
- Stabilized
your manual 5G core setup becomes active and interconnected.
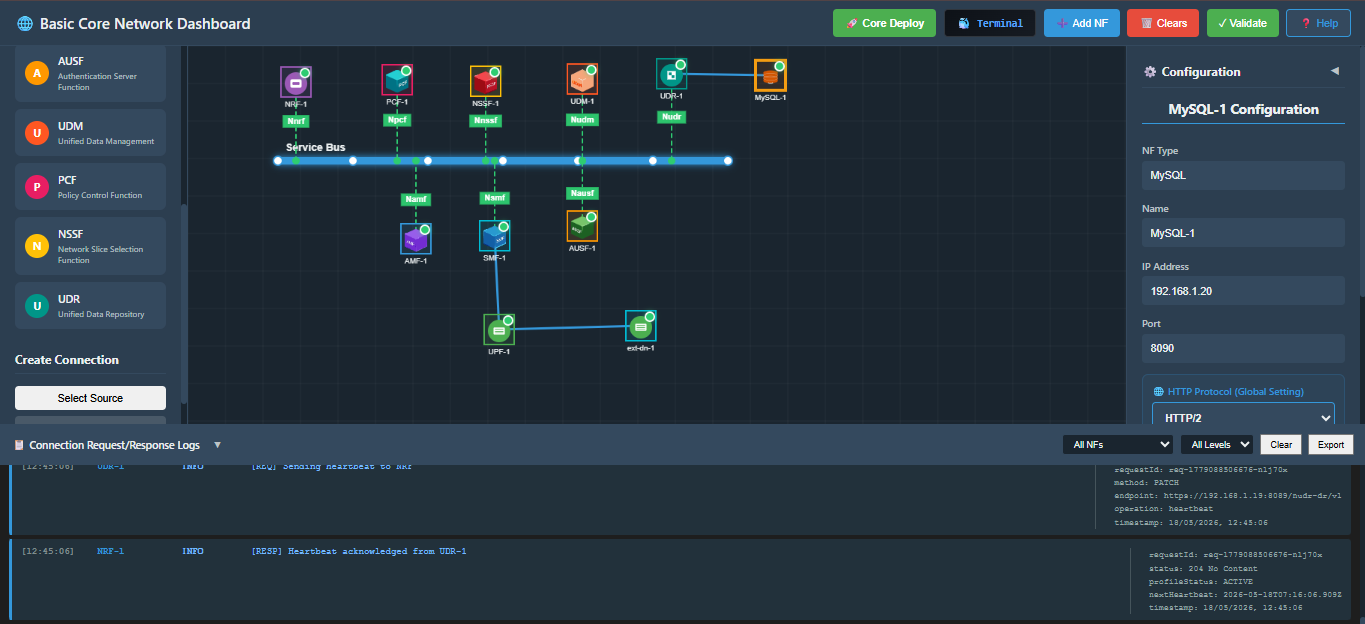
Fig: Manual NF deployment completion and topology status.
Method 3: One-Click Core Deployment
This method automatically deploys all Network Functions at once.
Step 1: Initiate One-Click Core Deployment
- Click the Core Deploy button.
- A deployment process begins automatically.
- The system may take some time to fully initialize depending on the number of NFs.
Step 2: Understand the Automated Deployment Steps
The following steps are executed internally during one-click deployment:
Clearing Existing Topology
- Removes previously running NFs and resets the workspace.
Loading Core Configuration
- Imports predefined NF settings and parameters.
Deploying Network Functions
- Automatically launches all required NFs.
Establishing Internal Connections
- Ensures inter-NF communication using SBA interfaces.
Finalizing Deployment
- Performs a stability check and completes the 5G Core initialization.
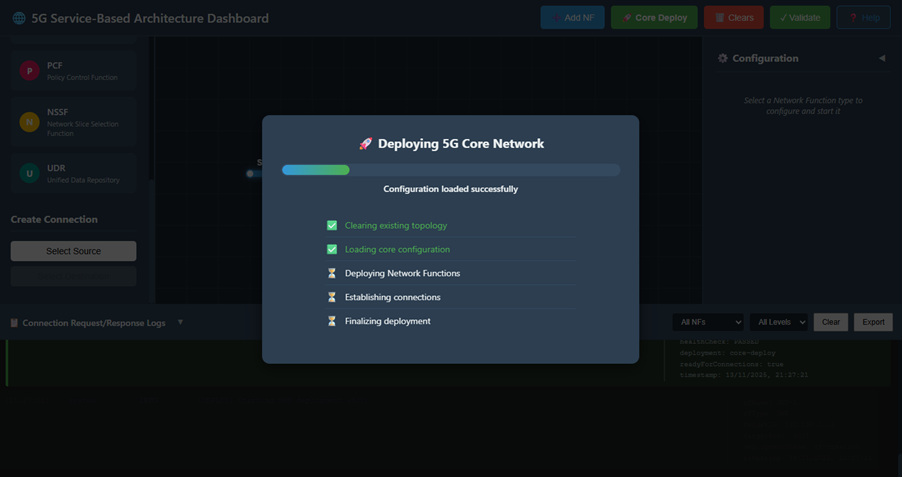
Fig: One-click core deployment progress in the dashboard.
Step 3: Verify Deployment Logs
Scroll to the Logs Panel to observe system messages such as:
- AMF started successfully
- NRF registration completed
- All NFs connected
- Core deployment finalized
These logs confirm successful automatic deployment.
Troubleshooting & Validation
Step 4: Test Connectivity Between NFs Using Ping
You can confirm whether NFs are reachable using the built-in ping terminal.
1. Open the NF Terminal
- Select the NF you want to test (e.g., AMF).
- Scroll down the configuration panel.
- Click Open Command Prompt / Terminal.
2. Perform Ping Test
In the terminal input field, enter the command:
ping <Target_NF_IP>Example:
ping 192.168.1.21Click Enter to execute the ping.
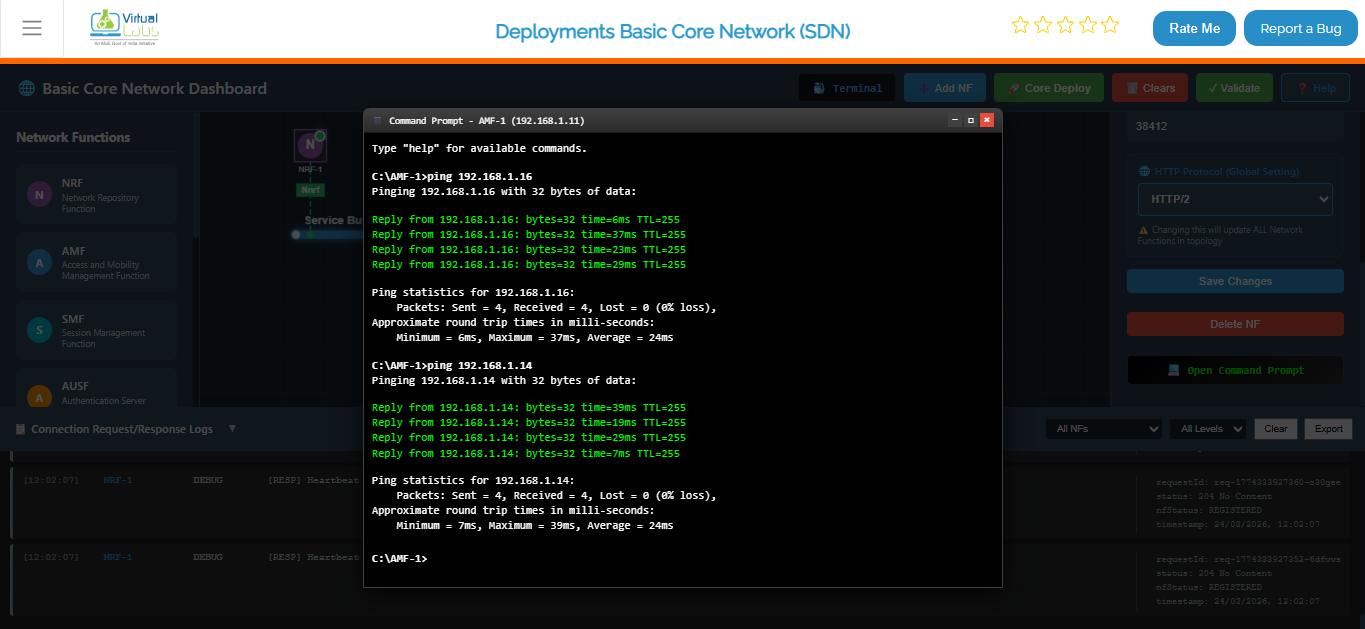
Fig: Ping test terminal verifying NF connectivity.
3. Analyze the Results
A successful test will show:
- Continuous reply messages (e.g., "Reply from 192.168.1.16…")
- 0% packet loss
- Stable latency
This confirms that:
- Both NFs are active
- The network path is functioning
- Core communication is stable